ProjectManage
This document describes how faculty sponsors manage projects on the PRObE clusters. Creating a project is the first step in the process of running experiments on PRObE (i.e. all experiments must have a parent project). Once a faculty sponsor has created a project, then he or she can invite researchers, students, and teaching assistants to join the project and run experiments under it.
If you are not familiar with the PRObE project, the PRObE home page ( http://www.nmc-probe.org/ ) has an introduction and links to the PRObE FAQ and case studies.
Overview
Before attempting to create a PRObE project, please review the PRObE user agreement document. Next select a PRObE cluster to use. New PRObE users typically start off on Marmot or Denali before moving to the larger clusters. The current cluster choices are:
| Name | Link | Nodes | Cores | Node RAM | Node Storage | Comment |
|---|---|---|---|---|---|---|
| Marmot | https://marmot.pdl.cmu.edu/ | 128 | 256 | 16GB | 1x 2TB | General use ([hardware details]) |
| Susitna | https://susitna.pdl.cmu.edu/ | 34 | 2176 | 128GB | 1x 1TB, 2x 3TB, 1x 64GB SSD | High core count ([hardware details]) |
| Denali | (Decommissioned) | 128 | 256 | 8GB | 2x 1TB | General use ([hardware details]) |
| Kodiak | https://kodiak.nmc-probe.org/ | 2020 | 2048 | 8GB | 2x 1TB | Large cluster ([hardware details]), must [reserve] to use |
To create a new project, click the link for the appropriate PRObE cluster to get the main web page for that cluster. The next step depends on if you do or do not already have an account on that cluster from a previous project. If you do not have an account, then you must create both an account and a project. If you already have an account, then you just need to add a new project to it.
Creating a new account and project (no previous account)
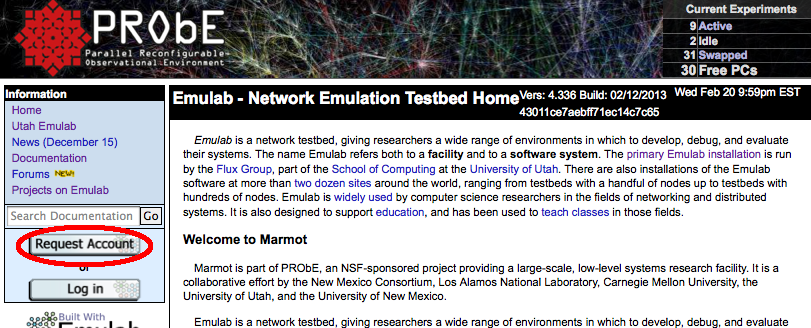
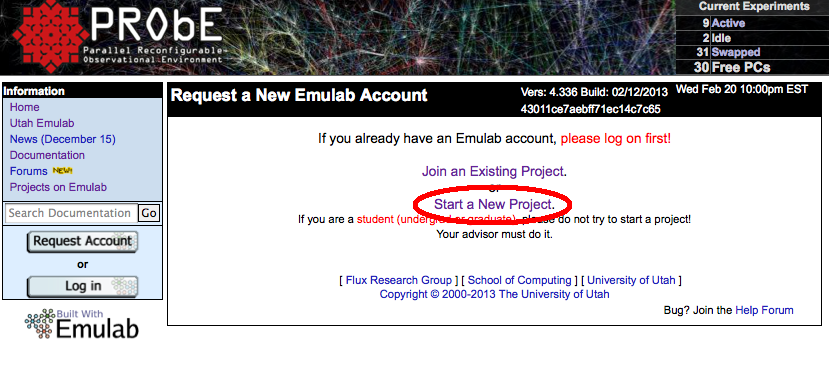
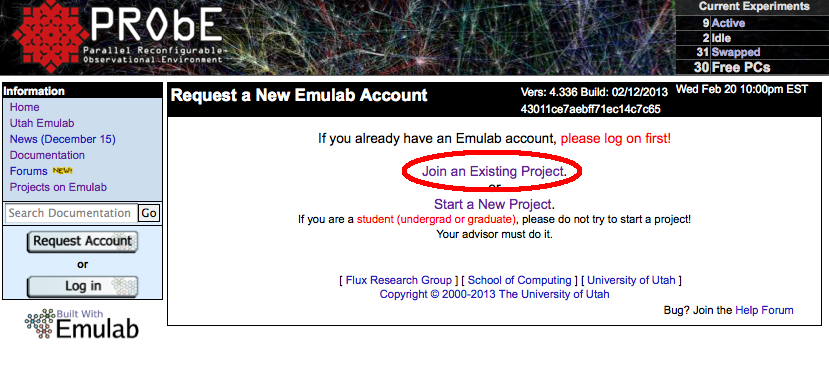
Select "Request Account" on the main page, then click on "Start a New Project" to access the main account and project creation form:
|
|
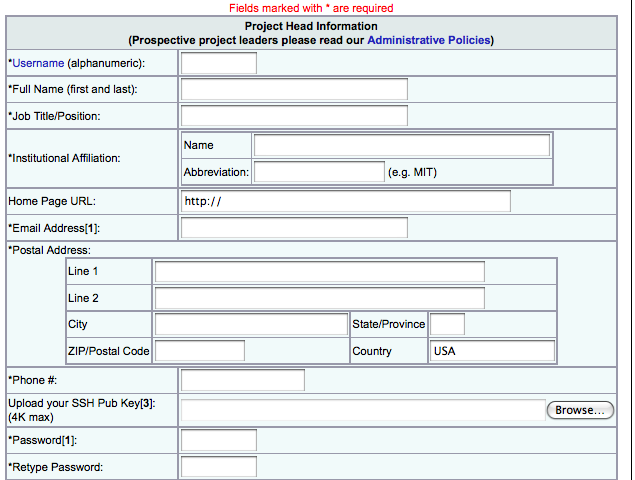
The first part of the project creation form (called "Project Head
Information") is used to create your new account. The most critical
parts of this form are the username, full name, email address, password,
and ssh keys as they are used to create your password entry.
|
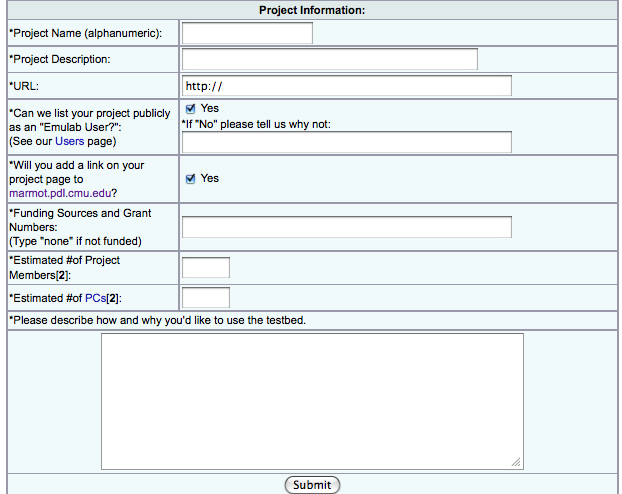
The second part of the project creation form ("Project Information") is used to create the new project. The critical parts of this form are the project name (used in /etc/group and to name the shared project directory) and descriptions.
|
Once you have filled out the form, click the "Submit" button at the bottom of the page. The cluster will send you email to verify you address. Once your email address has been verified, the cluster will send you email with your login information. Then you must wait for your new project request to be approved. New project approval is done by manually, so it may take a day or two for the PRObE cluster operators to complete this part of the process.
Creating a new project from an existing account
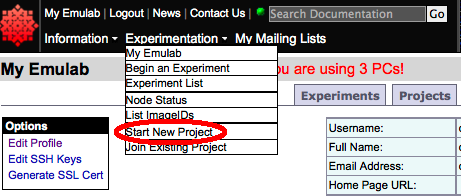
If you already have an account on the PRObE cluster, then first login to your account by clicking on the "Log in" button on the main web page. Then go to the "Experimentation" pulldown and select "Start New Project" from the menu.
|
This will pull up the "Project Information" form that is used to create the new project (show above in the previous section). The critical parts of this form are the project name (used in /etc/group and to name the shared project directory) and descriptions.
Once you have filled out the form, click the "Submit" button at the bottom of the page. New project approval is done manually, so it may take a day or two for the PRObE cluster operators to complete the process.
Dividing a project into subgroups (optional)
Users in a project can optionally be further divided into subgroups so that the experiments in each subgroup of a project are isolated from experiments in other project subgroups (via /etc/passwd and /etc/group). This may be useful in class-related projects where each student (or group of students) is doing their own assignments.
Details about subgroup management can be found here.
Inviting users to join your project
Once your project has been created, you can invite users (e.g. students) to join it. If the user your are inviting to join your project does not have an account on the PRObE cluster you are using, then you should ask them to click "Request Account" and then click "Join an Existing Project":
|
|
|
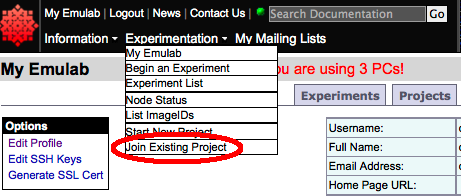
If the user you are inviting already has an account on the PRObE cluster, then they should login and select the "Join Existing Project" option from the Experimentation menu:
|
In either case, you should provide the user with the name of the Project to join. If you are using the optional subgroup feature, you should also provide the name of the subgroup to join.
Approving requests to join a project
When a user applies to join your project, the cluster will send you notification email. To approve the request, first select "New User Approval" from the "Experimentation" pulldown menu:

|
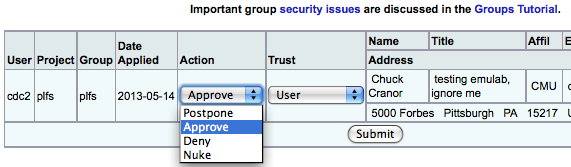
This will generate a web page with a table of pending approvals at the bottom:
|
Select the user to approve, change the "action" pulldown to the desired action, and then choose a "trust" level. A trust level of "user" will give the user non-priv access to the project. A trust level of "local root" will give the user root access, but not allow that user to edit groups in the project. A trust level "group root" will allow that user to to also approve new users and edit group memberships.
After setting the "action" and "trust" level, click "submit" on the bottom of the page to complete the approval. The user will receive email letting them know that their request to join the project has been approved.
Running experiments in a project
The process of joining a project and running experiments under it is described here.
Removing users from a project
To remove a user from a project, first select the project through the "My Emulab" link as shown below:
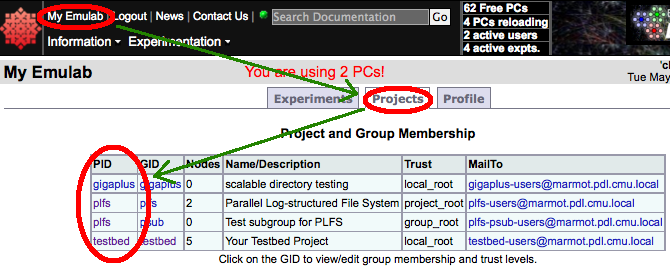
|
Then click on "Remove Users" from the "Project Options" menu:
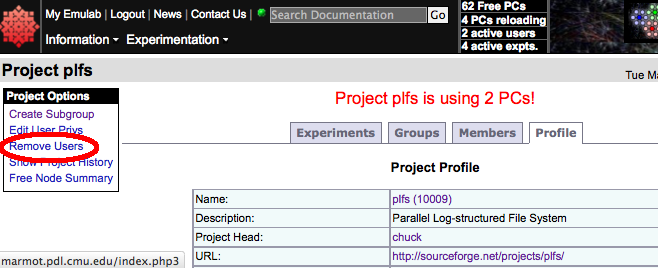
|
Then in the "Project Members" table, click on the red dot under the "Remove" column of the user you wish to remove.
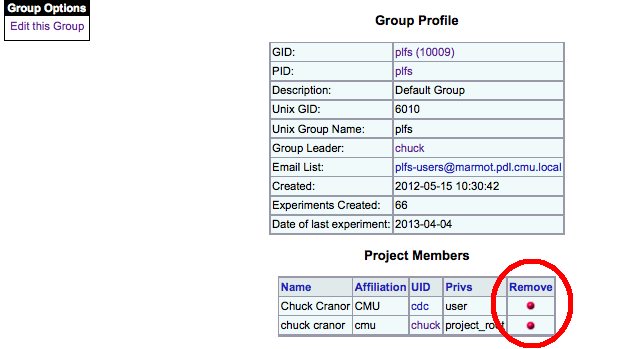
|
Concluding a project
Once your project has finished using a PRObE cluster, you should:
- notify all users in your project that it is complete
- copy all important data from ops to your local system
- reduce your disk space using on PRObE so it is available for others to use
- notify PRObE operators the project is complete and can be deactivated (XXX how?)
Crediting PRObE in publications
When writing up results for work generated with PRObE systems, please include an acknowledgment for PRObE in your papers, as described here.